
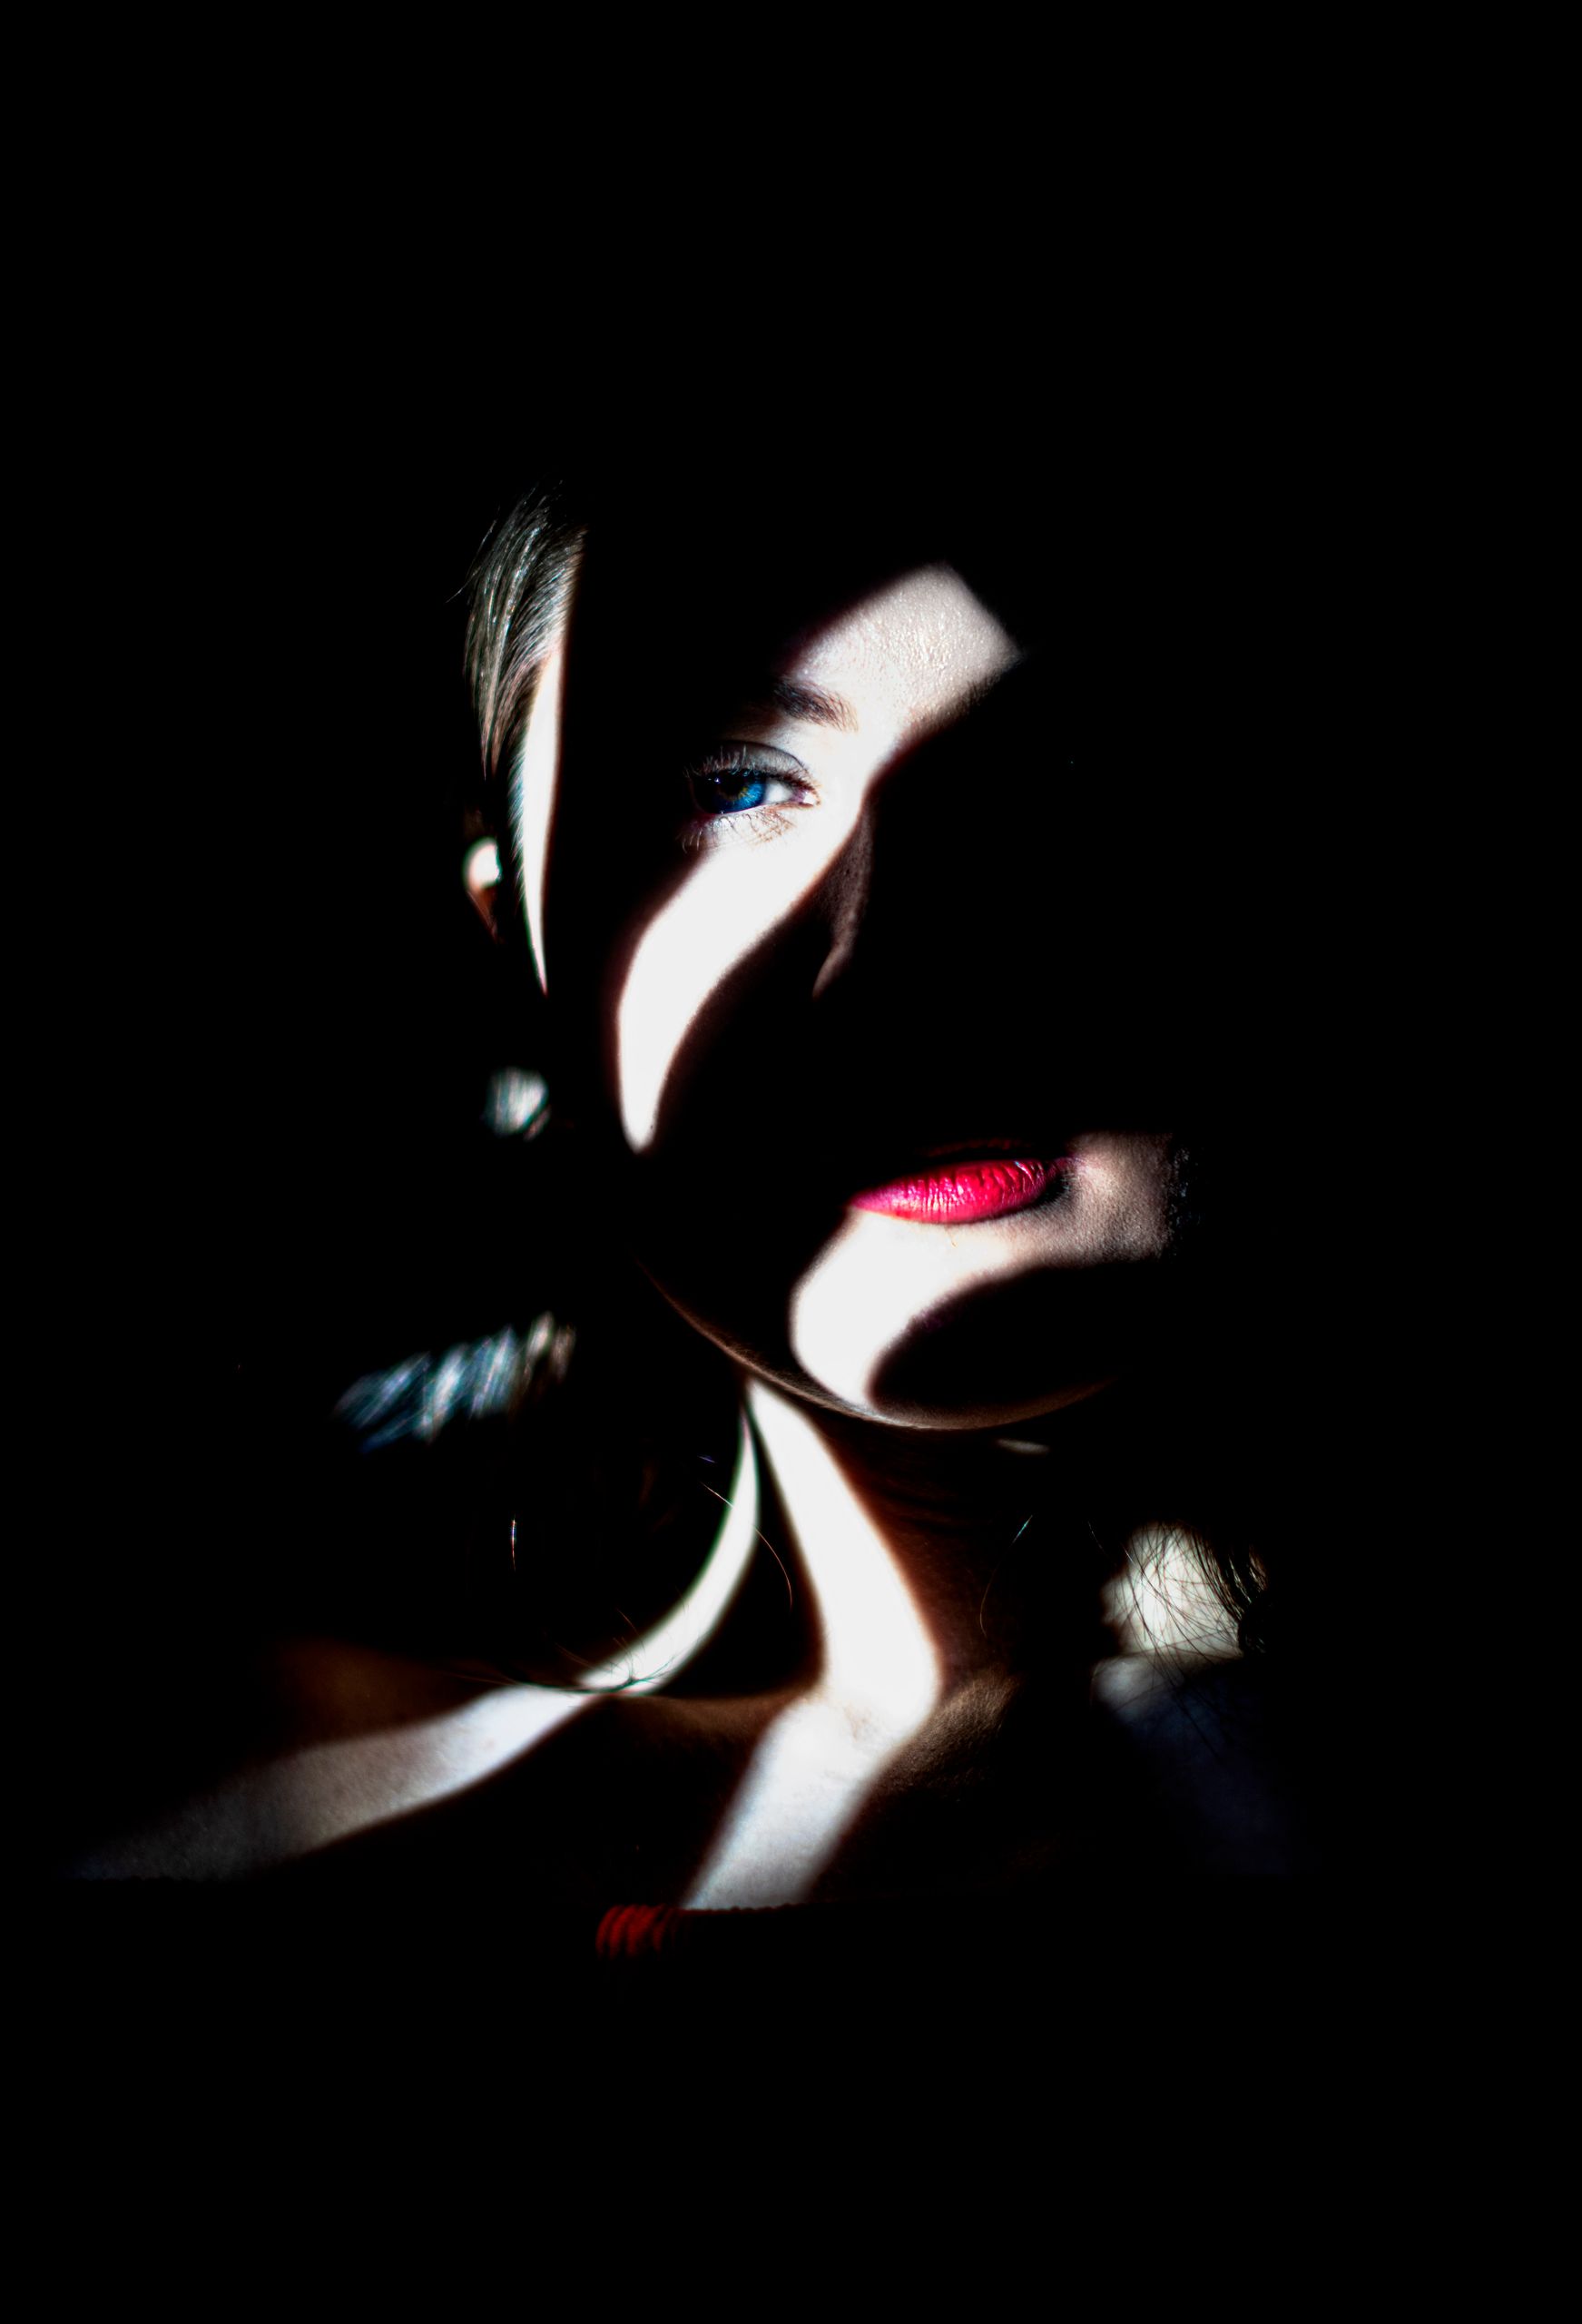
To achieve this high-contrast, editorial lighting look—which creates a “masking” or “gobo” effect—you are essentially controlling precisely where light falls on the face while letting the rest fall into deep shadow.
The Technique: Gobo Lighting (Go Between Optics)
This look relies on placing an object between your light source and the subject to cast a shadow that sculpts the face.
-
The Light Source: Use a hard light source, such as a focused strobe with a narrow beam (snoot) or a speedlight with a grid. You want a crisp, defined light edge, not soft, diffused light.
-
The Obstruction (Gobo): Position a “gobo”—which can be anything from a piece of cardboard with a slit cut into it, to actual blinds, or even just your hand—between the light and your subject.
-
Positioning:
-
Place the light slightly to the side and slightly above the subject to mimic a window or shaft of light.
-
Adjust the distance of the gobo from the light source. The closer the gobo is to the light, the softer the edge of the shadow will be. The closer the gobo is to the subject, the sharper and more defined the shadow edge will be.
-
-
The “Onyx” Background: Keep your subject far away from any walls or background surfaces so that no spill light hits them, ensuring your background remains completely black.
Tips for Success
-
Exposure: Expose for the highlights on the skin. Because you are shooting against a black background, your camera will likely want to overexpose the shot; use your spot meter on the brightest part of the face.
-
Negative Fill: If you are in a room with light-colored walls, use black foam boards (“flags”) on the shadow side of the subject to prevent any ambient light from bouncing back into the shadows and ruining that deep “Onyx” look.
-
Styling: Since you have a strong, bright red lip in your style guide, ensure your makeup artist uses a matte finish to prevent the bright light from causing unwanted glares on the lips.